articles
How to Connect to The Raspberry Pi Robot Without A Home Network - Part 7
Wednesday, July 27, 2016
I will be using a software image called CINCH, which requires no network setup to connect to the Raspberry Pi mounted onboard the GoPiGo robot. This method is great because sometimes I have issues getting my Raspberry Pi GoPiGo robot on my home WiFi network. You simply turn on the Raspberry Pi GoPiGo and CINCH will automatically broadcast a WiFi network called "dex". Once you connect to it, you can go right away to "http://dex.local/" and start programming!
Using CINCH for connecting to the Raspberry Pi GoPiGo robot is definitely much easier than connecting with Ethernet first, and then setting up the WiFi through your home network. Here are the steps to connecting to the Raspberry Pi GoPiGo robot without a home network:
Step 1) Head over to Dexter Industries Raspbian Flavor Cinch and download the CINCH image RAR file (size 1.2 GB)

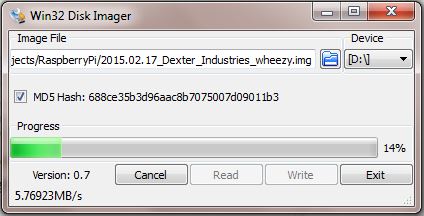
Step 2) Burn the CINCH image onto your Raspberry Pi's SD card (you need at least 4GB of storage space). To burn the image onto the SD card, you will need software to uncompress the file (you can use WinRAR), as well as a tool for writing images onto removable devices (you can use Win32DiskImager).

If your desktop computer does not have an SD card slot, you will need an SD card USB adapter like the one above. Then, it's just a matter of burning the image onto the SD card and wait for the SD card writer to burn the image.


Once the CINCH image is burnt onto the SD card, you will want to expand the image so that you can use the full available space on your SD Card (you will notice the image only takes about 3.5 GB of space). To expand the image, simply login to Terminal and enter "pi" for the username and "robots1234" for the password. Then, type in sudo raspi-config to bring up the Raspberry Pi Configuration console. Select Expand Filesystem and then click OK.


0 comments