

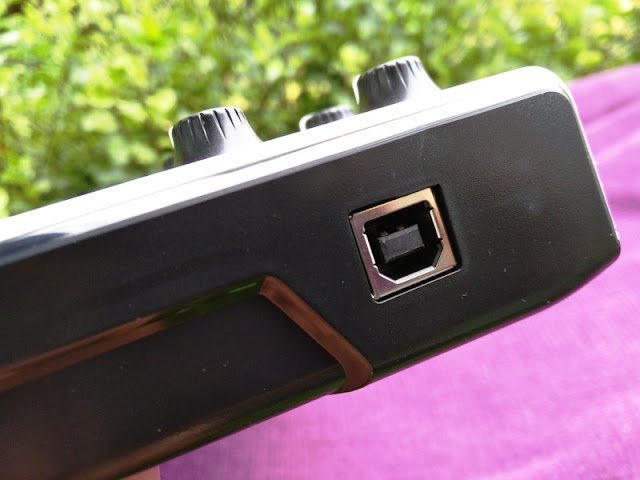
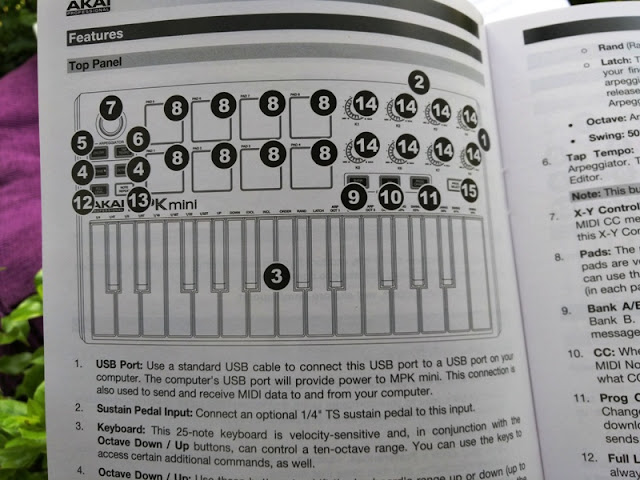
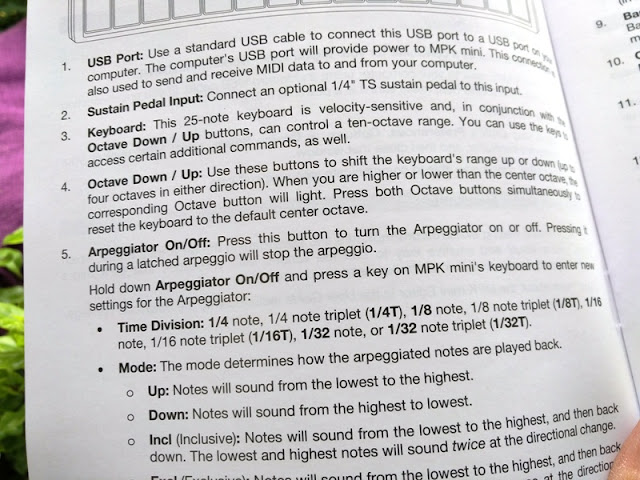
USB port connection on right side of keyboard

raised rubber feet
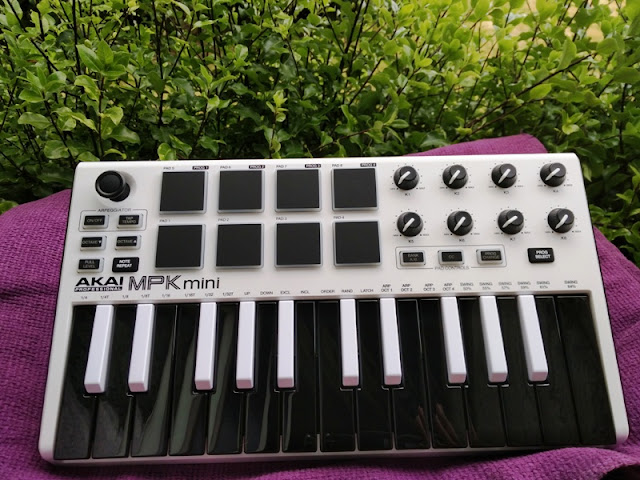
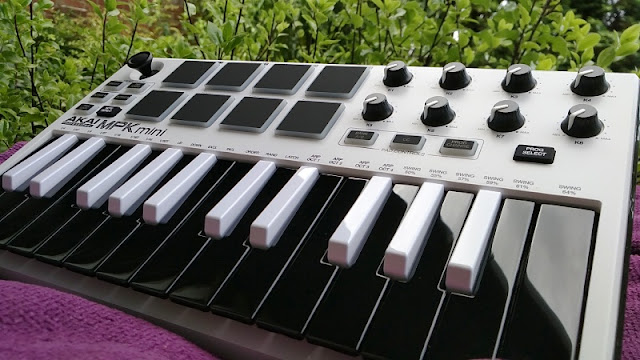
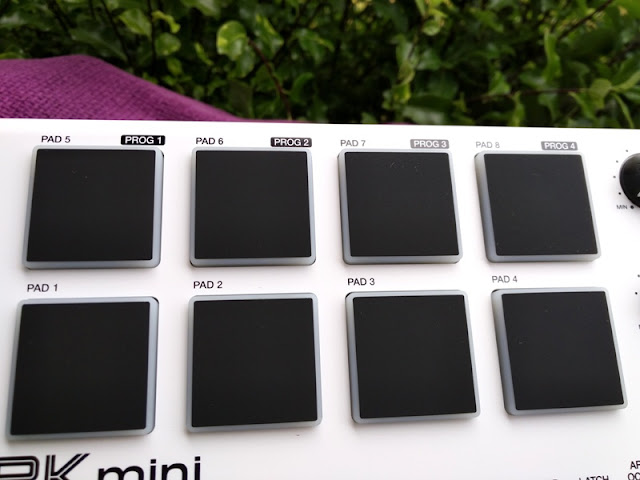
The Akai MPK mini special edition keyboard features 25 velocity sensitive miniature keys, 8 MPC pressure sensitive pads, a pitch bend 4-axis controller and Octave, Down/Up buttons that can control a 10-Octave range.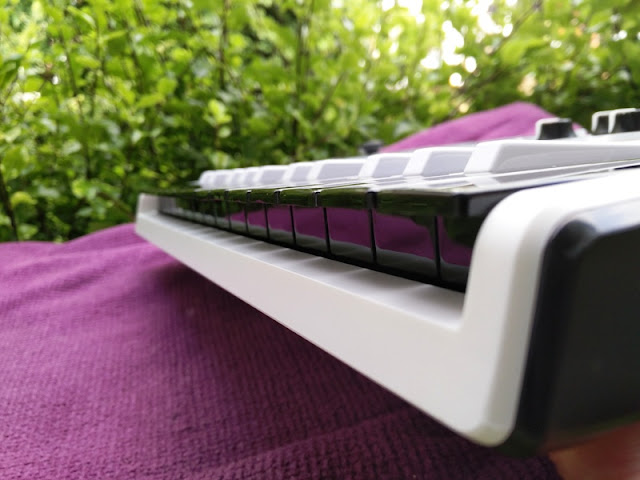
The X-Y joytick is the pitch bend (X-axis) and modulation (Y-axis) function to bend the pitch and change the tone of a note, while the pads are used to trigger drum hits and other software samples.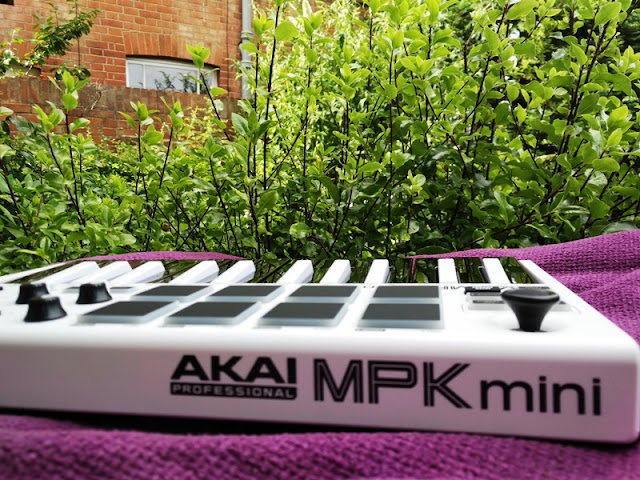
the MPK mini mkII is 1.5 inches (3 cm) thick
The MPK Mini MKII Editor download is available for both Windows and Mac.
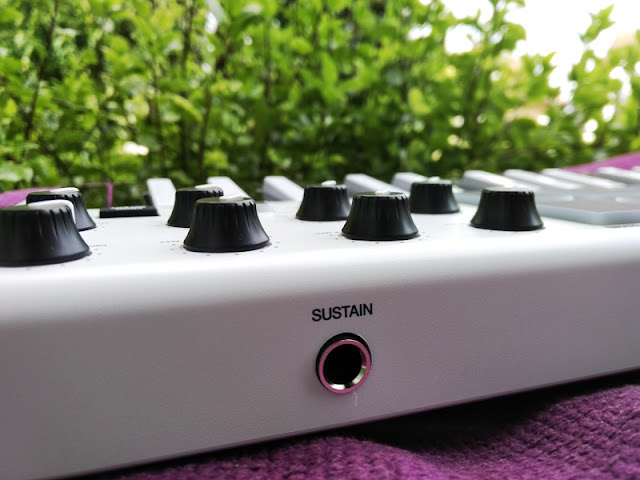
the MPK Mini MKII can work with a sustain pedal of any polarity
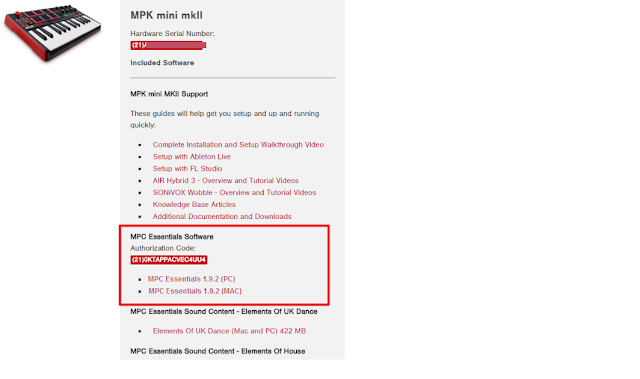
Hook up the mini mkii keyboard to your PC with the included USB cable and register the MPK keyboard by creating an account with Akai. This is necessary so you can get the authorization codes to start using the included software. Once that's out of the way, you can install the software included to produce beats and make music. The included software is MPC Essentials, Hybrid 3 and Wobble.
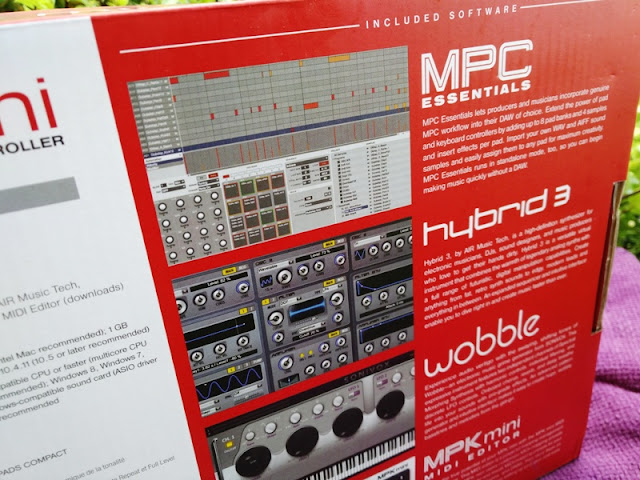
MPC Essentials, Hybrid 3 and Wobble contain ready made sound samples (kicks, snares, synth stabs, etc), beat sequences (pre-recorded MIDI files) and programs to get you started right away before learning how to create your own.


The Program tab (see screenshot above) allows you to convert samples (as well as chopped samples) into sample Programs that you can then use to assign to a pad by clicking on the 'Assign' button at the bottom of the Sample Edit Window. This video tutorial walks you through it.
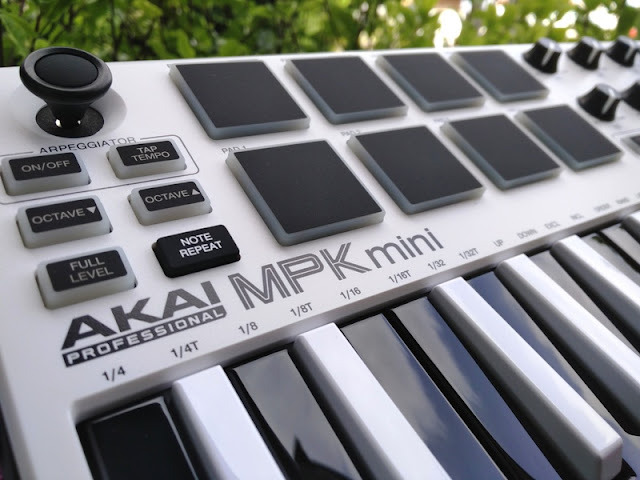
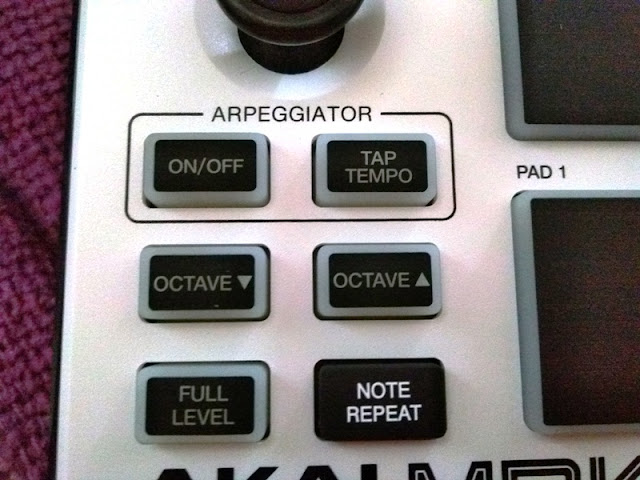
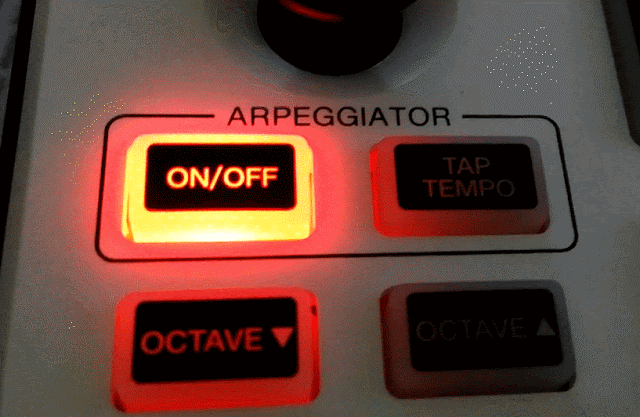
As far as the buttons, knobs and pads on the MPK mini mkII keyboard, you have an Arpeggiator function that consists of an ON/OFF button and a Tap Tempo to set the speed of the note by tapping the button with your finger as fast (or as slow) as you want the speed of the note to sound. The Arpeggiator basically allows you to change the structure of any note you hold down on the keyboard and repeat it.
With the Arpeggiator function, you can also change the structure of a kick from an instrument track without affecting playing the snares and high hats on the pads.
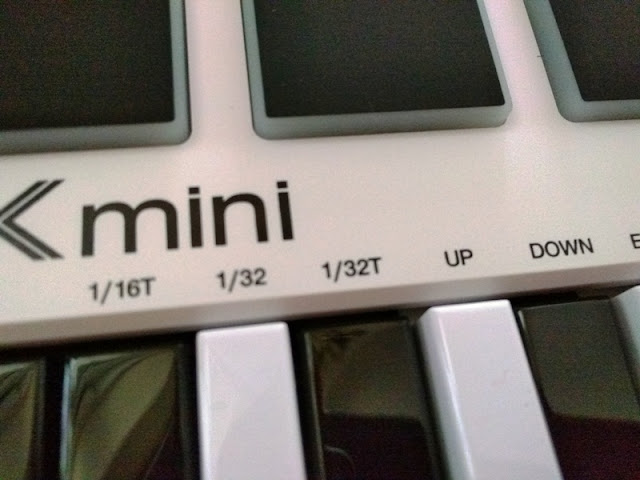
the numbers on top of the keys are the menu functions (note values)
So for instance, if you wanted to play a 1/8T note you would hold down simultaneously the ON/OFF button on the Arpeggiator and the 1/8T note key while pressing UP or Down to set the duration of the note. Pressing UP or Down sets the note to be played from a rising to descending (down) order or descending to rising order (up).The Full Level button turns the pads non-sensitive so you can press the pads with any force and produce the same beat, which is great for recording a drum/sample pattern. The Note Repeat button is designed for the pads and functions similarly to the Arpeggiator for the keys. Hold down both the Note Repeat button and any pad and the sound will repeat.
Mini MKII's Pad Controls
The Bank A/B button allows you to switch between bank pads: A (1-8) and B (9-16) as the MPK Mini has only 8 physical pads. Bank A/B gives you a total of 16 pads when using the MPC Essentials software. When pressing the A/B button on the MPK, it will switch between the top and bottom portions of the first bank in Essentials.
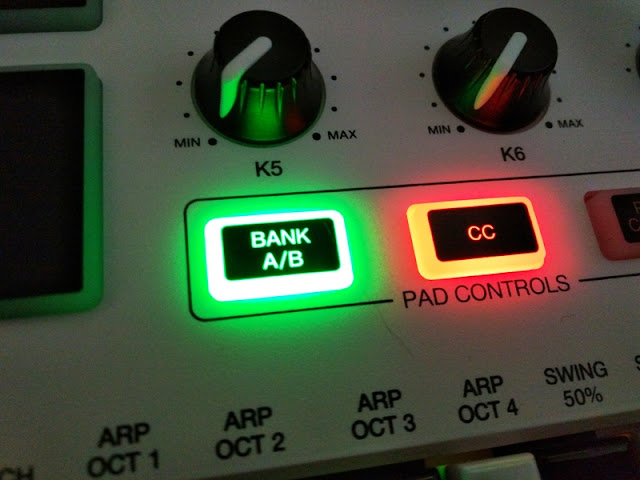

The CC button is also designed for the pads so when activated and pressing a pad, you can send MIDI CC messages instead of MIDI Note On messages. A MIDI note message tells you what note was played, how hard the note was hit, and what MIDI channel the note was played on. These messages can then be translated to digital information that can then be read by any other device supporting MIDI.
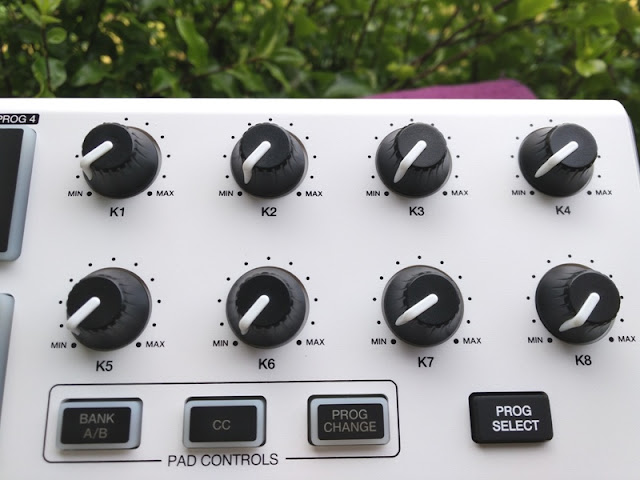
As far as the knobs you see on the top right corner of the MPK mkII keyboard, these are 270-degree assignable knobs for controlling the sound effects of the pads. Before you can use the FX knobs, you need configure them with the MPK Mini Editor software. Each knob will send a unique MIDI CC so you will want to assign different parameters in the software to different knobs. You can change the MIDI CC that is sent with the MPK mini mkII editor software.

USB cable included
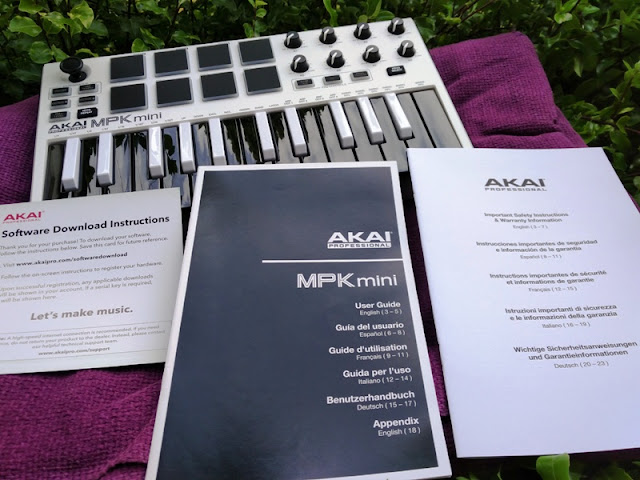
Inside the box


0 comments